Preferences
General
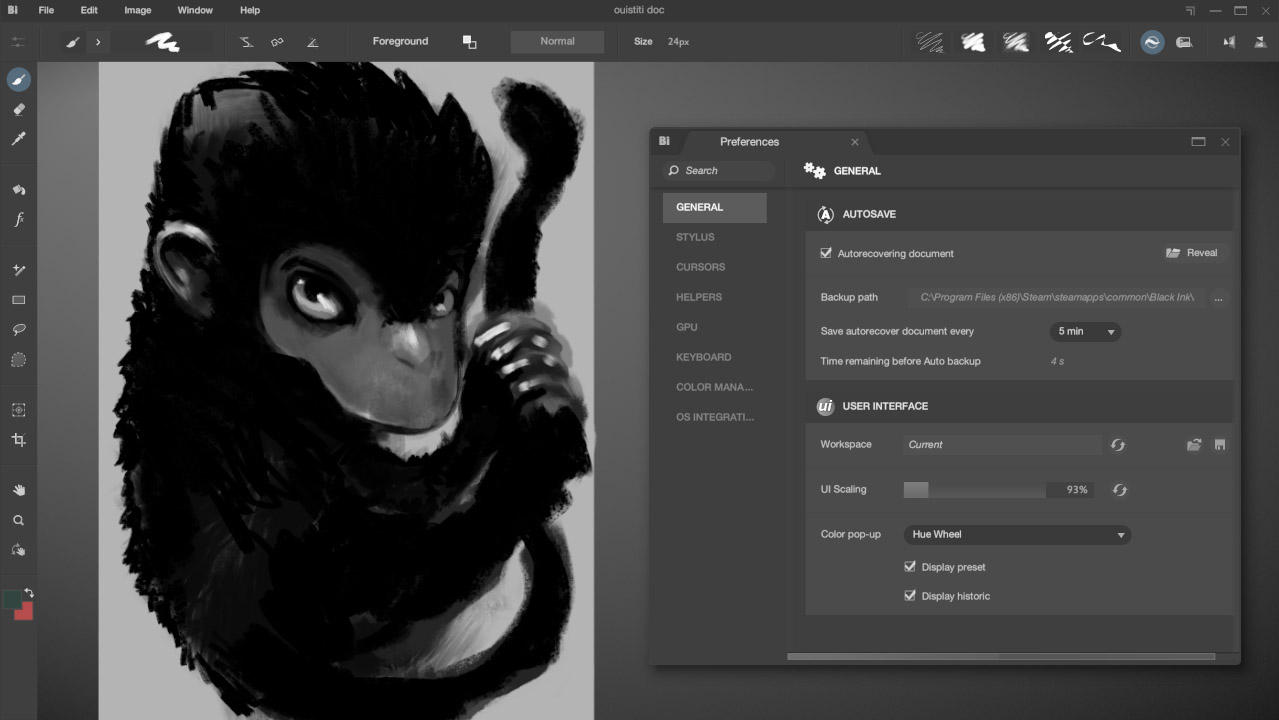
Autosave
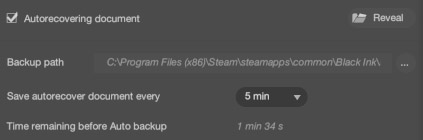
Despite our best efforts, Black Ink is a complex software and is not immune to occasional crashes. To prevent potential disasters, we have an auto-save system that activates seamlessly.
By default, this option is enabled, but you can disable it by unchecking the Autorecovering document option. The Reveal button next to it opens a file explorer in the directory containing the auto-saved files. You can change the Autosave directory by clicking on the '...' button just below.
You can also specify the frequency at which Autosave will occur. The control displays the time remaining until the next save.
If Black Ink crashes while you were working on the project MyFile, the first MyFile.autorecover.bkd file found in the Autosave directory will be automatically loaded. However, Black Ink will delete this file when you close the program (to avoid filling up your hard drive with Autosave files) and to prevent Black Ink from constantly reloading Autosave files. Before deletion, this file will be renamed to MyFile.lastchange.bkd to provide an opportunity for manual recovery if you forgot to save it. These lastchance.bkd files will be deleted upon Black Ink's launch if they are older than 15 days.
User Interface
Workspace

Managing Black Ink Workspace.
You can reset the current Workspace if you've made changes and are not satisfied with it. You can also save the current Workspace under a different name and reload it as needed. For instance, you may have a different Workspace for brush creation than for drawing.
UI Scaling

You can adjust the interface scale for the main Black Ink window.
Color popup

This section is for selecting options for the Global Foreground Color Popup. You can define the type of palette to use and decide whether you want to display preset colors and/or the history
Stylus
Settings for everything related to stylus and tablet management connected to your computer.
Settings
Tablet API

Black Ink must use an API to retrieve information from your tablet.
There are two possible choices:
- Windows Ink - This is the default Windows API to be used on PC. It is recommended to use this for the best functionality of Black Ink with a tablet.
- WinTAB - An API created by Wacom many years ago when operating systems did not offer APIs for tablet use. It is possible to use it for Black Ink, but with brands other than Wacom, it can sometimes lead to precision issues.
If you change the API, you will be prompted to apply your choice. Black Ink restarts its graphical interface for this.
Options
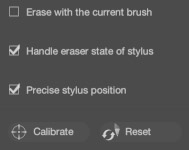
- Erase With the current brush - When enabled, the stylus eraser behaves exactly as the selected brush in eraser blending mode.Otherwise, use the default round eraser.
- Handle eraser state stylus - Depending on the state of the stylus the current brush will switch an eraser state.
- Precise stylus position - Only disable this if you still encounter stroke offsets after calibrating the stylus. This will read position from the mouse pointer and only take pressure information from the tablet's pen.
- Calibrate - If you encounter offset between the mouse cursor and the drawing stroke, use this process to calibrate your stylus.
- Reset - Remove user calibrattion and use default data specified by the tablet driver.
Stylus pressure curve
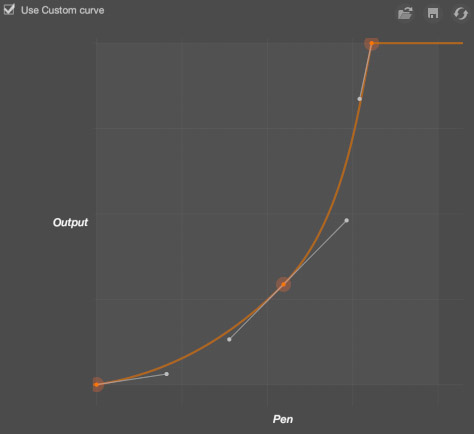
In this section, you can define a pressure response curve based on the pressure applied to your stylus. We recommend creating a response curve that best suits your drawing style. The default curve, for example, provides maximum pressure just before reaching 100% reported by the hardware.
- Use Custom curve - When enabled, it uses the custom pressure curve; otherwise, it uses the pressure values directly from the stylus in processing.
Possible actions on the three icons on the right:
- You can load a .bkdpa file corresponding to a response curve.
- Save your response curve.
- Reset your response curve to the default curve.
View of the curve:
Navigation shortcuts are similar to the Main View. By clicking on a position on the curve, you can add a control point. By holding down the Ctrl key, you can remove a point from the curve. By dragging a control point, you can modify the appearance of the curve. When drawing in Black Ink, if this control is visible, you can see the currently applied pressure and what the curve will output as intensity.
Info

Allows you to visualize real-time information provided by the tablet and stylus.
-
Tablet Driver: The driver currently used by Black Ink (see Tablet API).
-
Stylus ID: The ID of the current stylus. Some tablets allow for different types of styluses (e.g., airbrush). This ID helps identify them.
-
Eraser: Indicates whether the driver has detected the eraser mode of the stylus (sometimes the case when you flip the stylus as if it had an eraser).
-
Display Stylus Debug: Displays stylus-related information as an overlay on the canvas, including various detected positions over time, pressure, and stylus orientation. Only activate this if you want to ensure that the stylus is properly detected by Black Ink.
The curves allow you to view pressure, azimuth, and tilt of the stylus in real-time.
Cursors
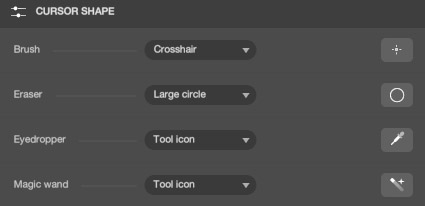
In this section, you can define certain software cursors. Here are the possibilities:
| Name | Image | Description |
|---|---|---|
Large circle |
 |
|
Small circle |
 |
|
Crosshair |
 |
|
Small crosshair |
 |
|
No cursor |
Displays no cursor. Note that using this option may make it difficult to navigate within the software. | |
Mouse arrow |
 |
|
Tool icon |
Will use the cursor provided by the default tool. |
Helpers
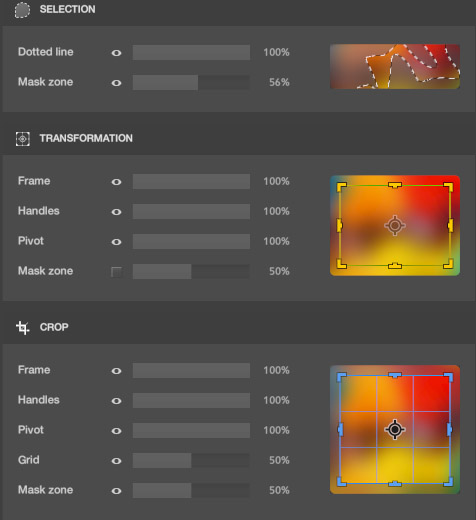
You can modify the appearance of some helpers/gizmos in the software in this section. This includes the selection tool, transformation tool, and crop tool.
Each parameter is self-explanatory and doesn't require detailed explanation here. Test and choose the look that suits you best.
GPU
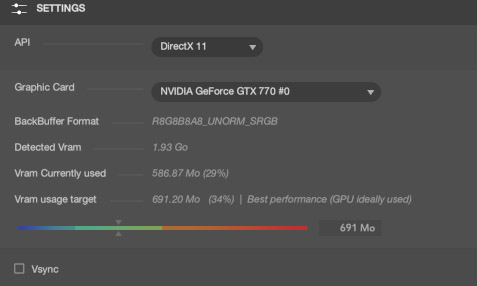
You can modify certain settings based on your graphics card in this section.
- Graphic Card : If you have multiple graphics cards in your PC, you can choose which one Black Ink will use for rendering (preferably use the most powerful one).
- Backbuffer Format: Information about the format used by the rendering buffer of the Black Ink window.
- Detected Vram: Displays the detected size of available VRAM on your graphics card.
- Vram Currently Used: Shows the effective size of VRAM used by Black Ink and the percentage relative to the total VRAM.
- Vram usage target: Indicates the target VRAM usage for Black Ink. Note that a value that is too low (e.g., 256Mb) can have a negative impact on Black Ink. A value of 1Gb, if possible, is optimal.
You can modify the Vram Usage Target with the slider just below. You can also directly enter a value in the editing control on the right.
- Vsync: When you enable this option, Black Ink will render the interface based on your monitor's refresh rate. This can reduce the resource consumption of your graphics card but may impact rendering performance in some situations. If your graphics card seems to be constantly running with Black Ink, it is advisable to enable this option.
Keyboard
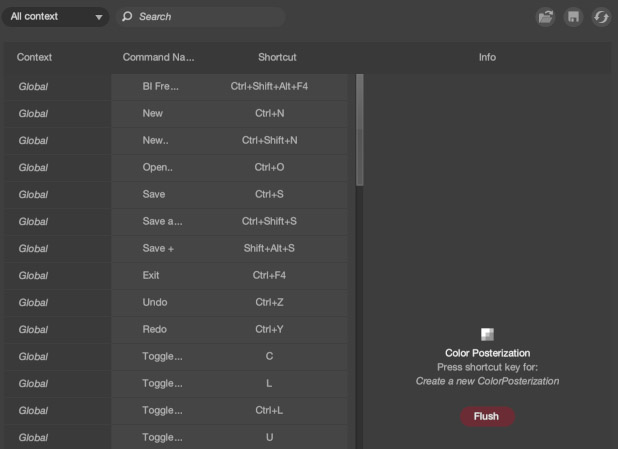
You can configure Black Ink shortcuts in this section.
By default, all shortcuts are displayed in this section. However, you have two ways to filter the shortcuts. The first is by choosing the shortcut context. There are several types of contexts:
| Name | Description |
|---|---|
All context |
Does not filter anything and displays all shortcuts regardless of their context. |
Global |
This context applies when a shortcut from the current context doesn't exist. For example, Ctrl+S will save the document even if you are in the Layer Editor context, unless that context has defined the Ctrl+S shortcut and assigned it to another function. |
CanvasView |
This context applies when a canvas View has focus, such as the MainView. |
Layer Editor |
This context applies when the Layer Editor has focus. |
Search: You can search for a shortcut. The search results provided will be filtered based on the shortcut's name and the shortcut itself.
Load: You can load a shortcut profile. Save: You can save your shortcut profile. Reset: Click this button to restore the default shortcut profile.
Note
On the disk, shortcut profiles are in the .bkshc format and can be found in the directory <Black_Ink_Data>/userdatas/Shorctut/
Color Management

How the colors of each pixel in Black Ink are stored and manipulated within Black Ink.
Image
Here, we will choose the color space in which Black Ink will work by default. Currently, only one format is supported: sRGB Linear. The Linear designation means that compared to a normal sRGB profile, no gamma curve is applied to the values, but the gamut will be identical to a standard sRGB profile.
Display
For each screen connected to your computer, you can assign a corresponding color profile. By default, Black Ink behaves as if the monitor expects data in sRGB, but this is not always the case. Therefore, you can load an .icc profile to have Black Ink convert the output pixel values to the desired color space for a specific monitor. By default, Black Ink will suggest the .icc profiles found in the operating system.
Update
Standalone Only
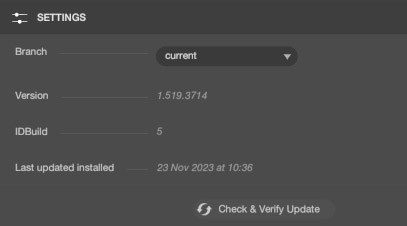
Section providing information on the updates for the currently installed version of Black Ink on your computer.
Branch: It is possible to subscribe to a different branch of Black Ink to access Beta versions, allowing you to test features still in development or to provide you with a specific test version to address a bug that may occur only on your configuration. We will inform you when this branch becomes available. For now, the default branch for Black Ink is current, and it is normal that there are no other choices.
Version: Indicates the version number of Black Ink currently in use.
IDBuild: Current Build Number in Use.
Last updated installed: Date of the Last Installed Update on Your System
Check & Verify Update: Will initiate the test on your files to verify that they are synchronized with the server version. If one or more files differ, they will be automatically downloaded and updated.
OS integration
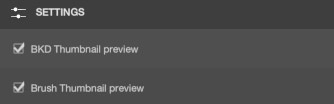
Here, we can configure how Black Ink will interact with the operating system.
- BKD Thumbnail Preview: When enabled, it allows you to see .BKD files directly from the operating systemlog.
- Brush Thumbnail Preview: When enabled, it allows you to see .bkbrush files directly from the operating system.
Debug
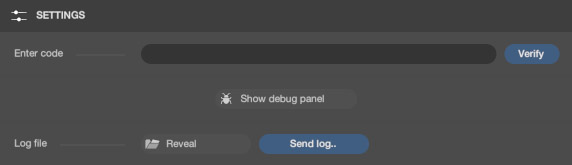
This section is dedicated to debugging. Sometimes, it is impossible or difficult for us to reproduce a bug on our machines. That's why we may ask for your help in identifying the root cause of an issue.
- Enter code: We can provide you with a code that will grant you access to certain debugging functionalities. Simply enter it here and validate to activate.
- Show debug panel: You will be able to bring up the Debug panel.
- Log file - reveal: By clicking this button, you will directly navigate to the log file of Black Ink.
- Log file - Send Log..: By clicking, you will be able to send us the log file directly. The send dialog will then appear.